Tuesday 29 September 2015

How to Boot Into Sony Xperia U Fastboot Mode


Fastboot mode
What is Fastboot?
Fastboot allows you to re-flash partitions on your Android device. It works through PC command line and connects over a USB connection with your device. Not every Android device manufacturer allows Fastboot access to end-users, but thankfully Sony does allow it.
On Sony Xperia devices you can unlock the bootloader using Fastboot and then flash/modify system or recovery images or completely wipe device’s data easily using the command line on your PC.
Also, if you ever come across the term ‘Bootloader mode’ than know that it’s the other name of Fastboot mode. Both these modes are one and the same thing.
There are multiple methods to boot your Xperia U in Fastboot mode. The most handy (and hardware coded) method is about pressing a particular hardware button while connecting the device to PC . Others are software based, let’s have a look at them below.

1) Boot into Xperia U Fastboot Mode Using HARDWARE BUTTONS

This method is a fail-proof method that’ll always work for you, unless you’ve broken one of hardware keys. In such a case you’d be left with only the other two methods discussed on this page.
Sony Xperia Devices Fastboot Mode
  • Switch off your Xperia U first
  • Press and hold the Volume Up button
  • Connect to your PC using a USB Cable while holding down the Volume Up button on your Xperia U
    └ Before plugging in the USB cable on your Xperia U make sure that the other end of USB cable is already connected to the PC.
  • Your Xperia U should be in Flash Mode now and the device’s LED light should turn into Blue

2) Boot into Xperia U Fastboot Mode Using ADB

ADB stands for Android Debug Bridge, a tool used to send terminal commands to a Android device via a PC command line. ADB requires a bit of setup, but it gets the job done with much lesser effort than hardware buttons, so pretty useful in cases when you’ve to boot into Fastboot Mode frequently. Also, if (for some reason) your hardware buttons aren’t working than this is a very good alternative to boot into Fastboot Mode.
First off, DOWNLOAD ADB FILES →
And make sure you’ve proper drivers installed for your device.
  • Extract the file (ADB files for Fastboot Mode.zip) you downloaded from the link above to a separate folder on your computer
  • Prepare your phone
    • Enable developer options: Go to your phone’s Settings » select About phone » Scroll to the bottom and tap on “Build number” seven times to enable developer options
    • Enable USB Debugging: Open phone’s Settings » select Developer options » Tick the “USB debugging” checkbox (under Debugging section)
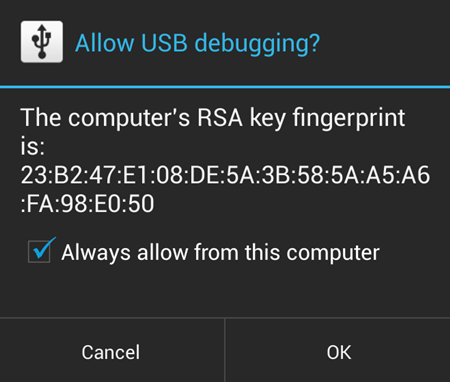
  • Connect your phone to PC with a USB cable and if/when a pop-up screen shows up on Phone asking you to ‘Allow USB debugging?‘ for the computer, make sure you tick the checkbox and tap OK
    Allow USB Debugging
  • Open the folder where you extracted the files and double-click/run the ‘Boot into Fastboot Mode.bat‘ file to reboot your device into Fastboot Mode
    └ If the script shows any error than that means either your device is not connected or you don’t have proper driver for your device installed on your PC.
For your information, the ‘Boot into Fastboot Mode.bat‘ script file that we used above to boot your device into Fastboot Mode only uses one line of command:
adb reboot bootloader
If you already have ADB setup on your computer and you know how to use it, then you may just use the command given above to boot into Fastboot Mode.

3) Boot into Xperia U Fastboot Mode Using Quick Boot (Reboot) APP

Yes! There’s an app for rebooting your phone into Fastboot Mode, and it’s the most easier of the methods we discussed above. But it won’t work unless you’ve root access on your Xperia U, and since not everyone roots their device, we’ve put this as the last method here.
ROOT ACCESS REQUIRED
  • Install the Quick Boot (Reboot) app from Play Store on your Xperia U  |  Play store link →
  • Open the app and grant Root Access
  • Select ‘Bootloader‘ from the list of options and it’ll boot your device into Fastboot Mode
That’s all.

Sony Xperia go ST27i/ ST27a Factory Reset Open Cover Case Insert SIM Card Memory Card

Just wanna give you a little information regarding with Sony Xperia go ST27 (ST27i/ST27a), in case you are mis-named with others Sony smartphone. Sony Xperia go has another name in other region (country distribution). You might know this ST27 as Sony Xperia advance. In most of features, hardware, and software specifications, both of the are designed with the same "things".

Sony Xperia go ST27i / ST27a Black White Casing Colors
Sony Xperia go ST27i / ST27a Black and White Casing Colors

One of my friend that own this phone demonstrate that this phone is very tough. He place his Xperia go on the glass full of bear, and it like nothing happen, his phone still works properly. After search for the appropriate info, I notice that the Sony Xperia Go obtained IP67 certificate for dust and water proof (up to 1 meter in water for 30 minutes). This phone's powered with dual-core 1GHz Cortext A9 with 512MB RAM and 8GB internal storage with microSD slot option. The OS launch with Android Gingerbread 2.3 but upgradable to ICS version 4.0.

Open and Attach Cover on Sony Xperia Go ST27i / ST27a


Opening the back cover of Xperia go would be a bit tricky. Whether you would be easily open the cover or got some problem on opening the casing depend on your "hand with its finger". On the bottom-left of the back cover, there is a strap hole in there. This strap hole also has another function for opening the back cover case. This strap hole is the first start as a opening key of the cover. Here the tips for you to open the cover.

Open Back Cover Case Sony Xperia go ST27 attach
Open Back Cover Case of Sony Xperia go ST27 and attach it back

With your left hand, hold your phone in rear face position and hand it at on rather top. Then using the the right hand, insert the thumbnail into the strap hole, press it and lift the cover until it's partly opened. It might open from bottom left then to some part of the cover. Resume on opening the cover by pull out the cover from side to side to the top until the cover is fully removed.

Finally, the next step is replace the cover (attach back) casing of the phone back to the body of Sony Xperia go ST27. Just align the cover casing with the body (make sure the camera hold is aligned with the 5 Megapixel rear camera) then press the cover down until it's attached and locked. You might hear a "clack" or "creek" sound when you do this. Do it, side to side. Mak sure there is no remind gap between the cover and the body of the phone. Done.

Eject Card holder, Insert SIM Card on Sony Xperia Go ST27i / ST27a

After you removed the back cover case, now you can insert your SIM card. The Sony Xperia go uses standard SIM card type, but you can't directly insert the SIM card to its card slot. It's because the card need  to be placed first on its SIM card holder (card tray). Therefore to be able to insert the SIM card, you had to eject the card holder from its slot. With your fingernail (forefinger) pull out the SIM card holder from its slot. The card holder slot provide on the left side of the phone (from front panel view, see the image to make sure where the location of this card holder slot).

Pull Out SIM Holder Insert SIM Card Sony Xperia go ST27i ST27a
Pull Out SIM Card Holder, Insert SIM Card of Sony Xperia go ST27i / ST27a

Place the SIM card to its holder and make sure that the gold-colored contact is facing up. Make sure that the cut-edge also align properly with the card holder, then you can insert the card holder (with the SIM card had already in) to the card holder slot. Done.

Insert Memory Card on Sony Xperia Go ST27i / ST27a


To insert the microSD memory card, you need to open the back cover casing (just like on SIM card), but at this time, even though you had removed / opened the cover, there is an additional protection on the external memory card slot. It has a special cover. This microSD card slot cover is applied to attain the IP67 certificate on dust and water proof. With the Xperia go rear panel facing up, you can find the location of this microSD slot with its cover on the top-right side of the phone (picture). There is a small gap on the cover of the slot, use this gap to pull out the cover using your finger nail. Insert your fingernail (forefinger) between the gab and pull it out. Then you are ready to insert your memory card (up to 32GB capacity).

Sony XPeria go ST27i ST27a Insert microSD external Memory Card slot
Sony XPeria go ST27i/ST27a: Insert microSD external Memory Card on its slot

With gold-contacts facing up, and it align properly (there is a picture carved tutorial above the microSD slot that you can follow), push the microSD card into its slot until it locked. Use your fingernail (or the side of SIM card or similar thing -- nail cutter for example) to press the card until it reach the end of the slot and locked. Then the final step should be place the cover back to its position until it's fully latched. Done.

Doing Hard Reset aka Factory Reset on Sony Xperia go ST27i / ST27a and Charge the battery.


If you owned this 3.5 inches phone for the first time and you wanna turn the phone on (by pressing the power button until it vibrates) for the first time after you had been assembled all the part (SIM, microSD memory, and else), you need to charge for at least 30 minutes the battery of this Xperia go. FYI, the battery is unremovable and replaceable type. This must be one of the reason to acquire the IP67 certificate. That is why there is no tutorial on removing and assembling the battery for this device. It uses Li-ion type with 1305 mAh capacity.

Turn Sony Xperia go On Reboot ST27i ST27a
Turn Sony Xperia go On, Do Reboot on ST27i / ST27a

To charge the phone all you need to do is connecting the microUSB port with your phone. The USB port for charge had a cover that you need to open first. Use your finger nail to open it. On the other end of USB plug the USB port into Power Adapter then finally plug the Adapter into Power Electricity Source in your Home. Done. Otherwise, you can directly connect the USB cable into Personal Computer. Though, we not recommend this charging option if it purposely for the first time of battery charging. It may take a little longer than via Power Adapter.

To do Factory Reset aka Hard Reset all you had to do just Go to Settings > Tab Privacy > Tap Factory data reset > Reset phone > Erase everything. But, in case you just wanna reboot / restart the phone, you can follow this key hardware combination: Press and Hold the Volume button and Power button at the same time, then release it whenever the phone vibrate. This action sometime also called as Soft Reset.

In case you phone stop responding or touchscreen is frozen, you can turn off the phone by Holding and pressing the Power button for about 11 seconds, then wait until the phone vibrates 3 (three) times, and release the key. That would shut down the phone automatically: forced shutdown. If the freezing problem frequently occurred, you can do Factory Reset, but make sure all you data got saved first (back up needed).

Detailed Guide FlashTool (Flash stock rom file. FTF) Fastboot simple

Detailed Guide FlashTool (Flash stock rom file. FTF) Fastboot simple
I think that if you use a Sony phone without using FlashTool know it's hard to talk to the rom. This article I want to go deeper, to look at those who do not know anything about FlashTool, after reading this article will have the most basic and easy to understand so that you can conduct a rom with FlashTool up easily.
Step 1. Preparation
FlashTool:
- With the 2011 Xperia users I recommend using 0.6.6 version Download here
- With the 2013 Xperia users should use the latest FlashTool 0.9.9.0 Download here

Step 2. Install
- Install the downloaded file
Detailed Guide FlashTool (Flash stock rom file. FTF) Fastboot simple
- If we have old FlashTool it will be forced to delete old and weighed FlashTool new FlashTool. So in order to not lose your data in C: \ FlashTool \ firmwaves To move the rom you copied into the new FlashTool to avoid deletion.
- We now proceed FlashTool setup for win, we setup file downloaded setup file and then continue to update
- If you have old FlashTool it will Uninstaller old FlashTool.
- Then it will install the new FlashTool, if you have not installed it will install FlashTool always.

FlashTool will default is C:/ FlashTool
Detailed Guide FlashTool (Flash stock rom file. FTF) Fastboot simple
- The next step is very important because through it relates to your phone with FlashTool contact or not. It is installed on our FlashTool C: \ FlashTool \ Driver to install the driver for your phone in the regime, fat machine, fashtool, fastboot

Detailed Guide FlashTool (Flash stock rom file. FTF) Fastboot simple
- I install Driver, you tick all the boxes home, Shelves it to make sure you tick as m . Rest assured my friends it's not as heavy as we might think only a few but not sure what was missing.
e installation, the installation process it will notify the driver has been installed, you just press Install dentist, it includes 3 types of drivers, so you just Click Install to have continued until this table appears as are.
- This phase ended we were then, we proceed to examine restart the computer (make sure that the driver is working well). And plug the phone cable into the computer
When taking into effect the following shall be considered as you're connected to oki
- After we're done, but the most important thing you need to do now is to test the state of the machine to ensure that the flash was not faulty. I turn the phone into computer mode flashmode to update driver and when we turned up it will press machine FlashTool you flashmode mode driver update is successful, then that step.

3. Using FlashTool (this will be in the evening to invite you to watch)
I will guide you to the 3 most basic features for users
I went to the most important features for FlashTool
a. Proceed flash firmwares
With the updata FlashTool firmwares users via file. FTF does not, if you are a beginner you can follow the pictures.
- You start FlashTool and kick the black lightning
Detailed Guide FlashTool (Flash stock rom file. FTF) Fastboot simple
FlashTool will tell you the status of the machine you are using, kernel, root, your computer ... generally all that you are interested.
- I choose flashmode
Detailed Guide FlashTool (Flash stock rom file. FTF) Fastboot simple
- Select the firmware to flash (usually firmwares have a file download. FTF file and copy it to C:\ FlashTool \firmwares)
Detailed Guide FlashTool (Flash stock rom file. FTF) Fastboot simple

- As shown on the I-4.1B.0.431 LT15i is selected. You will notice that as shown, do not tick off wipe data and cache wipe. If you tick off it for fear of losing the machine keeps your data will be bootloop. Note that as the home for you.
FlashTool will turn into a flash file, this union will take computer games to 2p for you to wait for my friend, if you can more FlashTool and carried off to start until this step.
- After it is finished, it will conduct appearing below the table.
Detailed Guide FlashTool (Flash stock rom file. FTF) Fastboot simple

- At this stage you pay attention
It contains 4 stages
1. Turn off your phone connection and computer
2. Turn off the phone
3. Hold down the Back (The computer does not have hardware keys Back Down keys but it is still showing as FlashTool Back key) to keep them
4. Plug the cable into the computer
To complete our work is attention off the phone, wait 30 seconds to reach the phone is shut down. With the Xperia Modum Back in 2012 do not have keys with hard keys left exposed phimBack we proceed by pressing Down and images of fish FlashTool your home remains constant.

- Wait for it flash 5p level is finished we can start the device and normal use, the boot time is slightly long should we wait to home, where not been impatience of man.
Fastboot basic.
1. As we proceed on installing the driver for fastboot
Detailed Guide FlashTool (Flash stock rom file. FTF) Fastboot simple
- After installation is completed, the device is fastboot mode to check. With our 2011 Xperia Shutdown> Plug the cable + Option keys. With Xperia 2012 or the machine does not have hardware keys're Shutdown Option> Plug the cable + Volume Up key (pump up the volume). And be sure to have the DC on
Detailed Guide FlashTool (Flash stock rom file. FTF) Fastboot simple
When signs Device Status: Fastboot mode, then your computer has passed the state Fastboot.
- Conduct a kernel flash: Just unlocked bootloader for the machine and only the dentist you.
1. We in FlashTool:
Choose lightning> Select Fastboot mode
Detailed Guide FlashTool (Flash stock rom file. FTF) Fastboot simple
Then it will give you a table to choose from:
Detailed Guide FlashTool (Flash stock rom file. FTF) Fastboot simple
If you flash the kernel you should choose option 2
If you choose flash system (this way previously done root for root Xperia 2012 but now has to kiss it)
I choose to flash the kernel:
Detailed Guide FlashTool (Flash stock rom file. FTF) Fastboot simple
I used this image for the facilities: You see what kernel I use is boot_Arc.img
After you have made your selection, the machine will automatically proceed to flash and we kick Close
You will see a screen like this FlashTool ie flash was successful
Detailed Guide FlashTool (Flash stock rom file. FTF) Fastboot simple
As I mentioned above done for you, but pretty basic knowledge for you to use and packed edit your phone, and make sure you do the proper actions will never best Read it carefully before you proceed .

Sunday 27 September 2015

How to Manually Repair Windows 7 Boot Loader Problems

If you’re having boot problems on your Windows PC, it’s often helpful to repair the MBR (Master Boot Record) to restore the Windows 7 boot loader—and you can do it easily from the Windows installation disc.
This is generally most useful if you’ve broken something and there’s a boot loader error, or if you have made the mistake of installing an older version of Windows on the same PC that already has Windows 7 which wipes out the boot loader.
Note: If your PC starts booting into Windows but fails, you should probably try using Safe Mode instead.

Boot From the Windows Install Disc

The first thing you’ll need to do is boot off the install disc, and then click through until you see the “Repair your computer” link in the lower left-hand corner.
image
You’ll need to choose the correct installation of Windows and then click the Next button.
image
And then you’ll get to the System Recovery Options screen, where you can get to the Command Prompt.
image

Repairing the Master Boot Record

If you want to restore the master boot record, you can simply type in the following command:
bootrec /fixmbr
You can also write a new boot sector onto the system partition with this command (which is often more useful):
bootrec /fixboot
And of course, if you just use bootrec /? you’ll be able to see all the options.
image

Replacing the Windows XP Bootloader with Windows 7

If you’ve managed to install XP on the same PC that you already had Windows 7 on, you’ll noticed that you can’t boot into Windows 7 anymore. You can use this command to fix that and restore the Windows 7 bootloader:
bootsect /nt60 all
Depending on the partition that you’ve installed, you might need to substitute the drive letter instead of “all”.
image
Note: if you want to restore Windows XP back to the menu, you can open up a command prompt in Windows 7 and run this command:
bcdedit /create {ntldr} -d “Windows XP”
image

Using the Automated Startup Repair

Of course, all this command-line stuff is probably not necessary in most cases. You can usually just use the Startup Repair option from the Recovery menu…
image
It’ll check for problems and probably fix them. If not, then you can always use the command prompt.
image
Have you ever needed to restore your boot loader to get Windows working again?

Thursday 24 September 2015

Lenovo S920 Update with the New version International Firmware ROW_S221

Lenovo S920 Update with the New version International Firmware ROW_S221


Lenovo S920 Update with the New version International Firmware ROW_S221 - New update for Lenovo S920 already release with build number S920_ROW_S221_150119, today this guide will explain step by step how to update Lenovo S920 to the new version of international firmware. I think this build number also can be obtain with OTA method but you need to have S220 installed on your device.
This guide will update Lenovo S920 using flash tool method, updating or modified your Lenovo S920 has possibility to brick and will erase your data so please consider it and always do backup preparations first before start following this guide. For now this build number is the latest update for Lenovo S920 it fix the bugs from previous version, improve speed on system interface, improve battery lifetime and etc.

Disclaimer :
This guide for educational purpose only, We not responsible if your device bricked after following this tutorial.  (DWYOR). This is for Lenovo S920 4GB for 8Gb there is another file and i will update it as soon as it available.
if you have phone produce in 2014 (can see on the box, or error 4032 while flashing), please refer to this usefulwebsite (use chrome)

If you got "UnRecognized ROM Detectd" the solution is use SP Flash Tool v3.1304, tick the preload ↦ click the preload  browse it to target_bin/preload.img

Lenovo S920 Update with the New version International Firmware ROW_S221

ROM Descriptions :
  • Build Number : S920_ROW_S221_150119
  • Date : 19.01.2015
  • OS : Android 4.4 KitKat
  • Languages : Russian , Ukrainian, English, Arabic, Spanish, French, Chinese, Vietnamese, Indonesian, Malaysian, Thai
  • Google Applications : Include
  • Root : Not Include
  • File Type : Full image install using flash tool
Downloads :
  • S920_ROW_S221_150119 ↦ 1.6 Gb, contains full image that needed to update your device to S221 using flash tool
  • SP Flash Tool v5.1428 ↦ optional downloads, download ROM also include flash tool inside it.
  • USB Vcom driver ↦ driver that need so the flash tool can recognize your device as USB port, needed to install first.
Lenovo S920 Update with the New version International Firmware ROW_S211
  1. First thing to do is install USB Vcom driver on your computer, without this driver installed on your computer flash tool will not recognize your device and progress bar will stay at 0%, for installing USB Vcom driver please refer to this below :

    • turn off your device and remove the battery, If you device using non removable make sure that your device is completely turn off wait like 20 seconds after power off the device
    • open device manager on your computer
    • connect your device using USB cable
    • there will be MTK65xx Preloader Devices show on your device manager, PORT section for 5 second or less and then disappear
    • disconnect and connect your device again, right click on MTK65xx Preloader Devices before it disappear, select Update Driver Software 
    • point it USB VCOM extracted folder, and install the driver from there.
    • disconnect and connect your device again, there will be Mediatek PreLoader USB VCOM Port on your device manager PORT section.
  2. After successful install USB Vcom driver now we can start the step to update Lenovo S920, for step by step for update please refer to below :

    • Extract ROM downloaded and the flash tool on then same folder, for easy organize it and flashing it. Go to flash tool extracted folder and run flash_tool.exe. If you are using windows 7 or later please run it using administrator privilege.
    • On the flash tool, please go to Options ↦ Option ↦ Download please make sure DA DL All with Checksum already checked, click X (Close) to back to Flash Tool, this option is very important so please don't forget it.
      Lenovo S920 Update with the New version International Firmware ROW_S221

    • Once back to flash tool, now please click on the Scatter-Loading button and point it to ROM extracted folder and the select MT6589_Android_scatter_emmc.txt this will automatically loaded all required images file to update your device, Please wait until flash tool finish processing the image files and become stand by.
      Lenovo S920 Update with the New version International Firmware ROW_S221

    • Change Download option from Download Only to Firmware Upgrade mode, now you can press Download button or hit CTRL+D. Flash tool will initialize the files that add to the flash tool and when finish flash tool will ready to make connection with your device.
      Lenovo S920 Update with the New version International Firmware ROW_S221

    • When flash tool already finish and stand by, now please turn off your device and remove the battery. Connect your device to computer using USB cable, flash tool will immediately recognize your device and begin to start flashing process, this process will take 5-6 minutes to finish and when you see GREEN CIRCLE in the middle of flash tool that mean flashing process already finish
      Lenovo S920 Update with the New version International Firmware ROW_S221

    1. Done, you have successful update your Lenovo S920 with firmware version ROW_S221, please confirm it with go to System Setting ↦ About Phone and look at the Build Number it must be same with the downloaded ROM.
    That all, Update Lenovo S920 with International Firmware version ROW_S221, this guide already been tested and working great. If you have problem or found any broken links please inform to me with leaving comments and i will very helpful, Thank you for visit